Project Page Contents:
1. Introduction & Early Test Flights
2. Second Stage Development & Flights
3. 2008 Model Overview
4. 2008 Model Construction
5. NARAM-50 Flight
6. Future Modifications
Competition Model Overview
The following paragraphs discuss some of the complexities and unique attributes of the competition model that was started at the end of 2003 and finally completed in July 2008.
Model Design Complexity
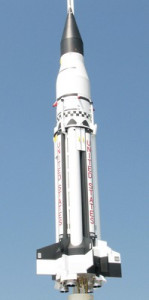
The 2008 Saturn I model is the most complicated project I have ever worked on. I learned a lot of things in the process that may someday lead to other complicated projects in the future. Think about the number of different parts and details of Saturn I’s that make them complex vehicles to model at any scale–and that’s just for a static model that cannot fly. Add to that the weight and logistical constraints of successfully flying a clustered and staged model. Add to that the space requirements of radio control gear. Add to that limited chute space due to RC gear. Add to that a list of several potential designs for the internal structure–none of which are perfect. And that’s just the design phase. Add to that the degree of difficulty in construction and the need for precise fit of major surface details on multi-angled airframe surfaces without using any filler for gaps (because the parts are assembled after painting)… you will begin to picture the complexity of this project.
Custom Plywood Tubing and Tapered Shrouds
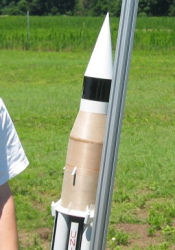
While the boilerplate used a few standard tubes, the competition model employs custom tubing for all but the internal structures (stuffer tubes and motor mounts). Each of the eight scale booster tanks is made from spiral-wound gummed paper tape just like in the original boilerplate, but coupled with a small section made of cardstock at the base. There are four tubes of varying diameter constructed of 1/64″ plywood rolled against the grain. The majority of the nose cone, as well as two other major tapered body sections were also rolled from plywood (I cannot recommend this technique more highly–thanks again to John Pursley and James Duffy for this method.
Extensive Use of Resin Casting
Cast polyurethane parts were used throughout the model. The nose cone tip, fins, and most surface details are resin copies of a custom master pattern. The larger four fins are unique because they were cast with a hollow cardstock core for weight reduction.
Unusual Building Methods (Bolt-Together Construction)
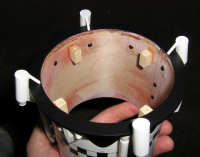
Most model rockets have major components that are glued together. The 2008 Saturn is assembled such that many of the parts can be adjusted, removed, and/or replaced if necessary (though not all parts), including parts such as individual fins, certain details, and tank tubes. Several #2-56 screws (some in conjunction with blind “T” nuts) are used to hold the “loose” detail parts onto the subassemblies, or hold multiple subassemblies together. The benefits of using lightweight screws instead of glue are pretty obvious:
- Replacing parts damaged in flight (or upgrading parts)
- Adjusting complex parts after attachment to the mode
- Firm attachment of some details (rather than surface-mounting
- Ease of access to internal assemblies or electronics compartment
- “Break-down” for easier transport (not a factor for this Saturn, which separated into multiple sections anyway)
This method has its drawbacks, too:
- Gluing a part in it’s proper place “forever” leads to a certain peace of mind
- Need for access to screw heads may complicate the model’s design (e.g. the Saturn I’s tail section has screws that hold 8 fins in place)
- Bolted-on parts must be colored or painted before attachment
- This process can slow down both design and construction
- Will not work as well (if at all) on smaller models (but is less necessary, anyway)
Thanks to John Pursley for recommending the bolt-together method.
Unusual Finishing Methods (Paint vs. Trim Monokote)
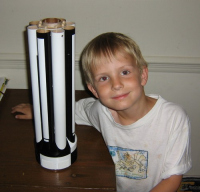
Another unusual feature of the competition model is the extensive use of Monokote Trim film (yeah, the sticky stuff, not the iron-on stuff). John Pursley used this method on his 1:10 Vanguard and 1:12 Mercury Redstone projects (he also used iron-on Super Monokote, but I have not yet mastered the art of iron-on coverings). The finish is durable, consistent, and covers over a multitude of surface imperfections. It also provides an excellent slick surface for adhering decal material. The results are well worth the effort to experiment with this stuff. With practice one can apply it dry over some surfaces (I covered my fins this way), or over primed & sanded (smooth!) surfaces with the water w/dish detergent method (my tail section, interstage, and most of my S-IV stage were covered this way). I was able to cover my black tanks using the dry method, but I had to contend with some bubble formation due to imperfection in the “straightness” of the tubes. The following is a breakdown as to the use of primer/paint vs. Trim Monokote on the Saturn’s parts:
Monokote-Covered Parts
- Tail Section assembly (incl. tapered shroud)
- S-IV Stage (non-tapered surfaces only)
- Instrument Unit/Payload Section
- Interstage
- Black Tank tubes & white band
- All fins (except for narrow leading edge)
- “Flat” or Low-Profile Surface Details
Primed and Painted Parts
- S-IV Stage (tapered surfaces only)
- Nose Cone
- White Tanks
- Rear of Tail Section
- Most Surface Details
- Scale Engine Nozzles
Unusual Teammates
This project would not have been successful without the support provided by my teammates. Jess, along with her unending encouragement, poured rubber molds, made castings, sprayed and sanded primer, made all the parachutes used in the test models and competition model. She even designed and built the the transport box that we used to carry the model to NARAM-50. Kevin Johnson encouraged and nagged me until I finished the model. He helped with the pre-flight prep at NARAM-50 by charging batteries, packing chutes, etc… and stayed up late with me one night to help me get the CG correct. Thanks, Kevin!
Continue to Page 4… 2008 Model Construction
