Recently, Chris Flanigan asked me about attaching scale model subassemblies to each other via fasteners instead of gluing. The following was my response:
I got the bolt-together idea from John Pursley. I used all metal fasteners. Nylon would probably get pretty expensive, and are probably too big to be very versatile. Almost all the fasteners on the Saturn are 2-56 sized, including both machine and self-tapping variety, most coming from www.microfasteners.com, some from McMaster-Carr. I ended up trying different head styles for different uses (and thus different allen wrenches needed). Here’s a fairly comprehensive breakdown of the various interfaces on that model:
Types of Interfaces Used on the 2008 SA-5 Model:
A) #2 button-head machine screws/blind nuts:
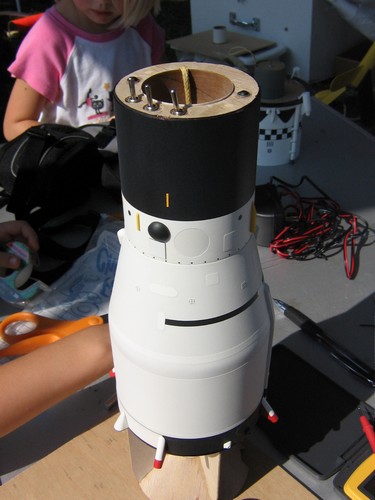
- Motor mount/stuffer assembly attach to scale S-I lower structure
- Mount upper stage motor mount to upper stuffer/RC assembly
- Dummy SM/IU (RC battery cover) mount to stuffer/RC assembly (holds scale S-IV together)
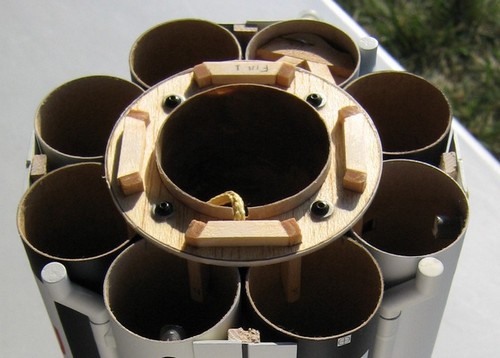
B) #2 button-head machine screws/threaded aluminum hex standoffs (example, part 91780A105 McMaster.com). Standoffs anchored to centering ring using additional screw
C) #2 button-head self-tapping screws
- Anchor resin details (pilot holes drilled in resin parts)
D) #2 Socket-head cap machine screws and washers
- Anchor resin fins (pilot holes drilled in fins)
- Anchor Interstage base plate to spruce tabs
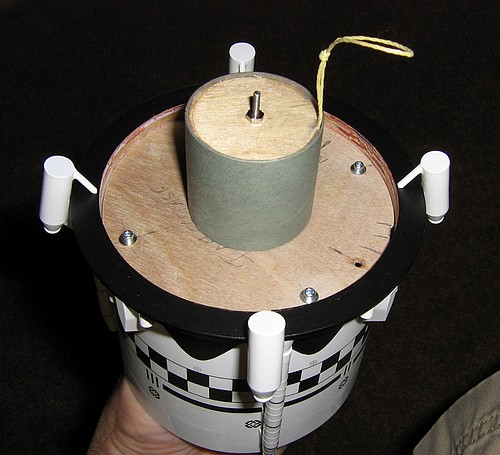
E) #2 Threaded Rod & hex nut
- Interstage/1st Stage Coupler
- Nose assembly (see also here)
- Anchor 1st stage motor retaining ring (long threads needed because of major gap between rings–it’s easier to attach nuts to exposed threads than to attempt to screw long screws into recessed [invisible] blind nuts). Actually, uses #2 machine screws instead of threaded rod.
F) #2 stainless steel soc. hd. cap machine screws
- Anchor scale base plate to scale S-I lower structure (doubles as “scale” details–sort of)
G) #4 truss head screws and blind nuts for custom rail button mounting
Here are some things to consider in designing a bolt-together model:
- I attempted to use #0 button-head self-tapping screws for some resin details, but I had trouble getting enough grip with the tiny allen wrench; also, adjustments to pilot hole size do not seem to yield useful results (too tight or too loose–usually too tight). IIRC, I ended up not using them at all (but I could be wrong).
- Self-tapping screws may need some bees’ wax assistance when working with the high friction of resin or other plastic parts.
- Button head #2 screws are going to be lighter than soc. hd. cap screws; button heads are great if you need a lot of them.
- Soc hd. cap screws use a larger wrench and should be good when you need more torque.
- Bolt-together assemblies may require precise planning of stop rings or ledges, etc. so things can rest in the correct locations.
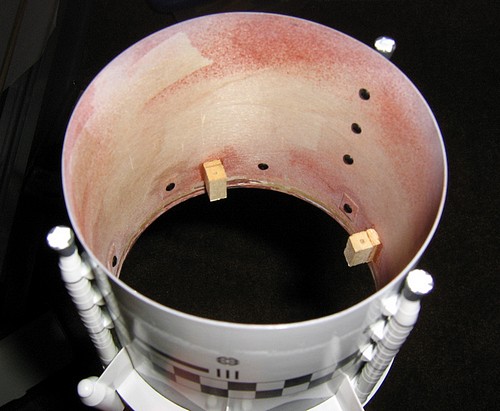
- Allow yourself appropriate tolerances (use slight .015″ to .02″ or more gaps between certain parts to your advantage) so that things will be snug (for example, my hex standoffs are slightly below the tops of my scale tanks so that the retaining ring will fit snugly on top of the tanks and not touch the standoffs).
- When working with #2 T-nuts, use an inserted screw to ensure alignment prior to gluing (factory threads in small blind nuts may not be perfectly aligned with the nut’s apparent axis). Use also to check quality of threads (threads in some #2 blind nuts can be of poor quality).
- Fastened assemblies do open up a lot of possibilities for maintenance, but they can be a pain, so plan wisely. Definitely something that requires the thinking of an engineer.
- Here’s something you may not think of… Get multiple allen wrenches to go with each type of screw. Keep one at home and at least two in your range box in case you lose one on the field. Maybe use brightly colored tape on them. You may even want to get a socket-type screw driver if you use any #2 hex nuts.
Hopefully this will be more helpful than it is confusing.
